Ever thought about joining two or more pieces of wood together? Well, if you’re a carpenter or woodworker, you most certainly have. To join one or two pieces of wood together, we make use of woodworking joints.
Woodworking joints or joinery, both traditional and non-traditional have been around for centuries, thousands of years ago, and till this day, we still make use of them.
This knowledge of the different types of joints allows us to build wooden structures like house frames, cabinet and furniture pieces, sometimes without using a single fastener like nails or screws.
Now, talking about woodworking joints, here’s a list containing some of the most popular and important ones from simple to complex ones you can use during your projects.
Table of Contents
1. Butt Joint
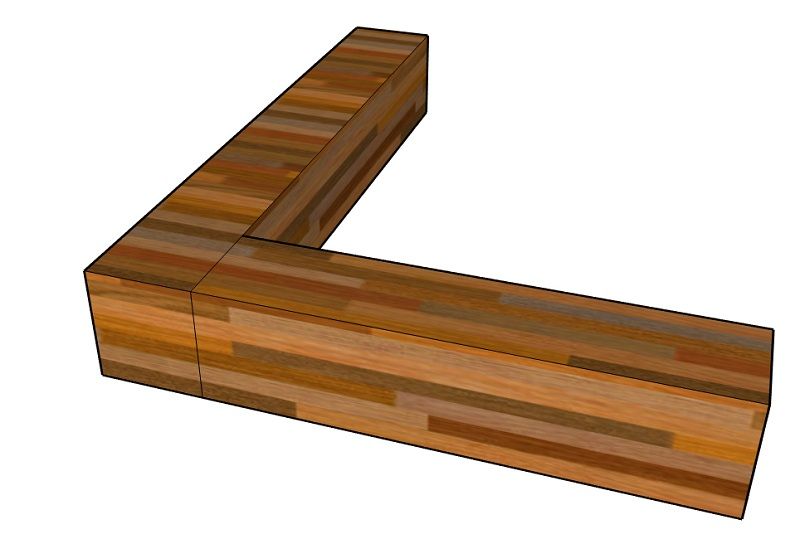
A butt joint is the simplest woodworking joint you can make. But it’s also the weakest. It’s simply joining two pieces of wood by butting the ends together.
With this joint, the end grain of one piece of wood is butted directly to the edge grain of another piece of wood. Both are joined together using glue or fasteners like nails.
This joint is so weak, one can easily separate a glued butted joint with his hands. Even when held together with fasteners like nails, you can still separate a butted joint from each other if you apply enough force with your hands.
The butt joint is not a joint you want to be using a lot, especially when building furniture or cabinet pieces that requires large tensile strength.
Related: 40 Woodworking Tools Every Woodworker Should Have
2. Miter Joint
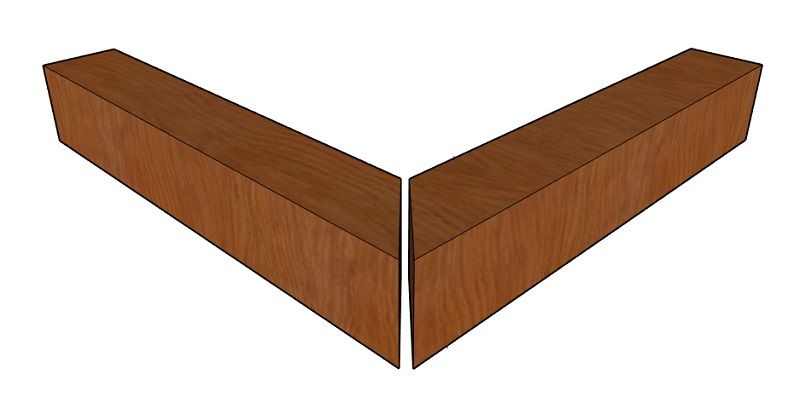
The miter joint is quite similar to a butt joint. However, the ends of both wood pieces are bevelled usually at the 45 degree angle.
When you create a miter joint, you get a seamless joint that doesn’t reveal any end grains of the two wood pieces being joined together. It effectively hides the end grains.
That is why it’s usually used by trim carpenters when installing moldings, base boards and window trim at homes. The ends of these moldings and trims are best joined together using a miter joint, and it hides the end grains of the board concealing where the moldings have been cut.
Related: 7 Best Jigs To Speed Up Your Woodworking Projects
3. Dado Joint
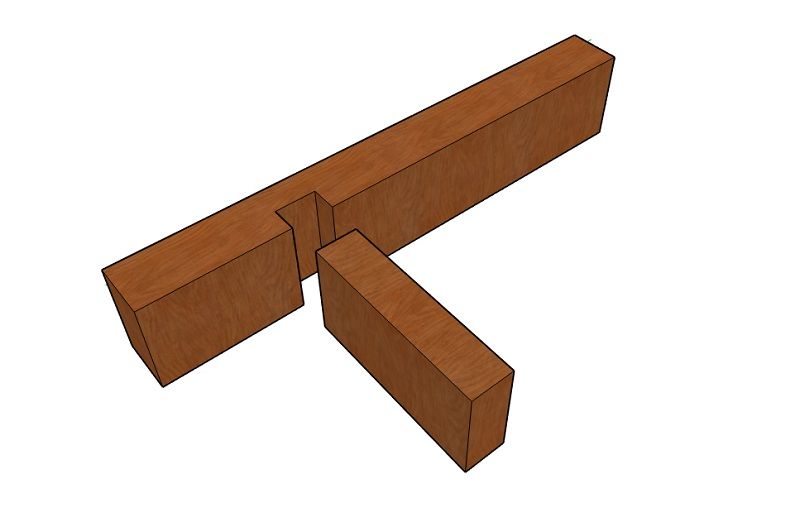
A dado joint is a very common type of joint used for furniture and cabinet making. It’s also called a tench joint or a housing joint.
With this joint, a slot is cut across the face grain of one piece of wood, just the size of the end grain of the other piece to be joined with it.
The end grain of the second piece of wood slots right into the slot or dado to complete the joint.
4. Lap Joint
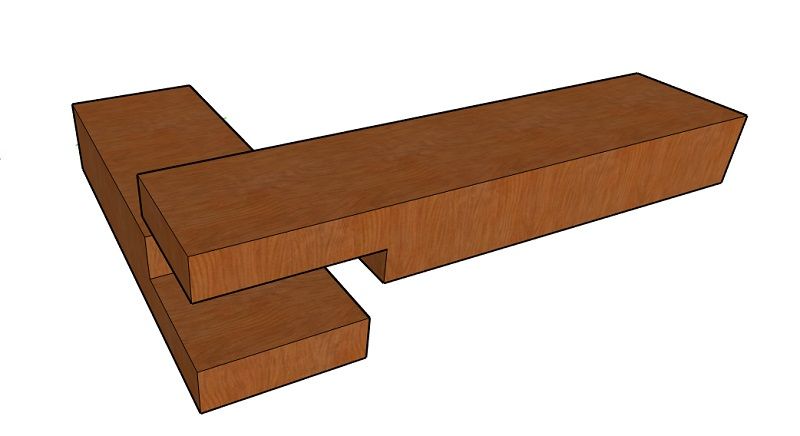
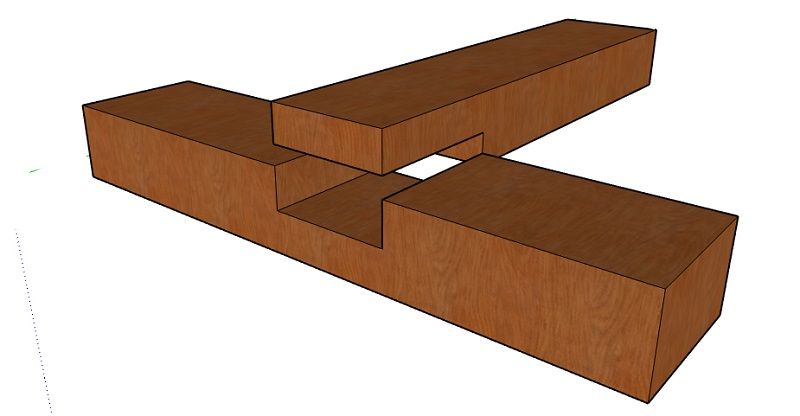
A lap joint is used not only for joining wood but for joining other materials such as plastic and metal. When you join two pieces of wood using a lap joint, the two wood overlap each other to form a very strong joint.
There are 2 main types of lap joints. A full lap joint and a half lap joint. In a full lap joint, the two pieces of wood or materials are joined together without removing material from either pieces of wood.
While in a half lap joint, material is removed from both pieces of wood, so that the resulting lap joint has the thickness of the thickest member of the two wood pieces.
Most lap joints have members of the same thickness, so that half the thickness of each wood piece is removed to form the joint.
When two wood pieces are joined together with a lap joint, the resulting joint is one of the strongest woodworking joints you can make, even stronger than mortise and tenon joints because the resulting joint has a huge ability to withstand shear forces.
5. Bridle Joint
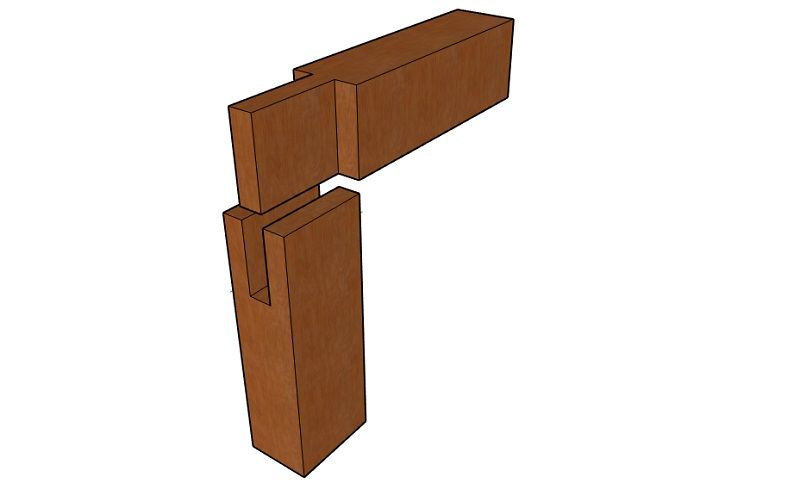
You can think of a bridle joint as a mortise and tenon joint with both mortise and tenon cut to the full width of the tenon member. In fact you can say that both are very similar.
What distinguishes the bridle joint from the mortise and tenon is the cutting of the mortise and tenon members to the full width of the tenon in the bridle joint.
The corner bridle joint is the most common of the bridle joints and it’s created in the corners of the two respective members.
The corner bridle joint is usually employed when joining rails with their upright members such as legs of furniture like chairs or tables.
Another variation of the bridle joint is the T-bridle joint which instead of joining corners of the two members, joins the corner of one member with the middle of the other member to form a T. Just like the corner bridle, the T-bridle also forms a very strong woodworking joint.
6. Dowel Joint
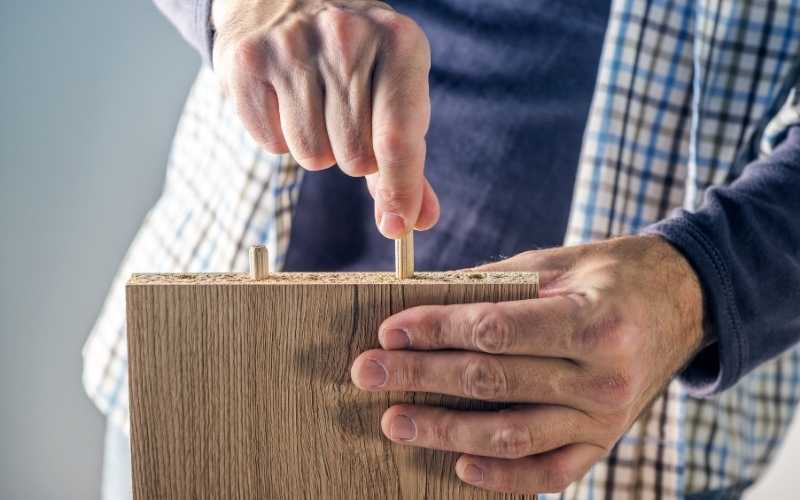
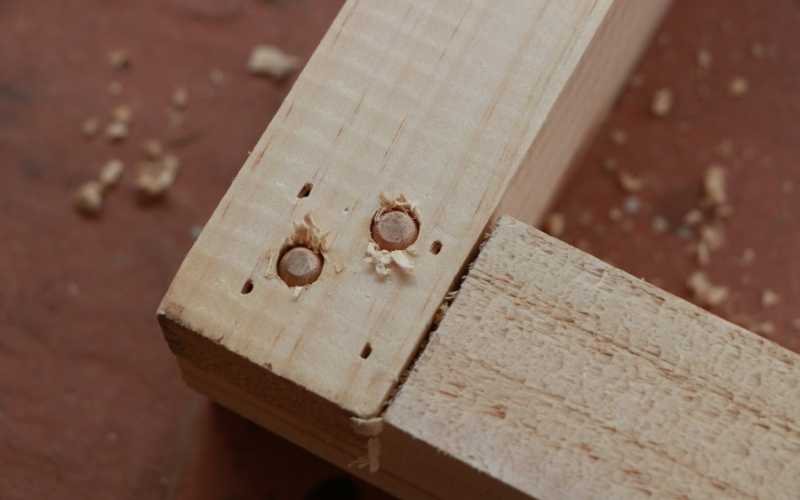
This is a very common joint you’ll find in factory made furniture because it’s very easy to make using production line machinery.
The dowel joint is simply a butt joint that has been reinforced with dowels. Dowels or a dowel is a cylindrical rod or pin usually made from wood, plastic or metal.
Talking about dowels, there’s a dowel rod and a dowel pin. The dowel rod is a long wooden, plastic or metal cylindrical rod which is further cut into shorter lengths to form the dowel pins which are used for making dowel joints.
Unlike butt joints, dowel joints are structurally strong and looks good if they’re well-constructed. To ensure accurate alignment of the dowel pins when making a dowel woodworking joint, woodworkers make use of a special measuring tool called a dowel center.
The dowel center is used to measure or mark the position of the holes for the dowel pins to be inserted.
7. Mortise and Tenon Joint
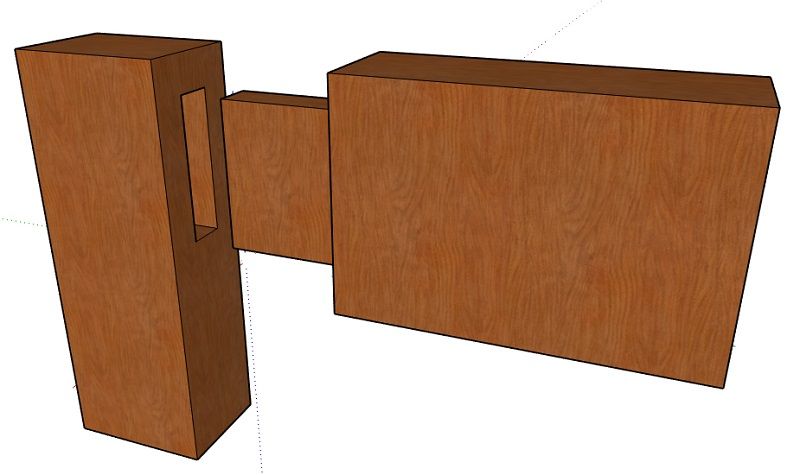
The mortise and tenon joint is one of the oldest woodworking joints known to man. Records show that even the Egyptians used it in ancient Egypt for making wooden brick molds.
It is used to join two pieces of materials like wood where one of the pieces being joined contains the mortise or rectangular hole, and the other contains the tenon or tongue that fits squarely and into the hole to form the joint.
The joint formed as a result of this combination is very strong. In fact, the mortise and tenon joint is one of the strongest joint you can use for your woodworking projects.
The only drawback is, it’s kind of difficult to make. You have to cut a square or rectangular hole in one piece of wood, then you have to cut the tenon precisely to fight squarely into the mortise.
Cut the tenon too small, and you’ve ruined the joint or worse still your materials.
8. Box Joint
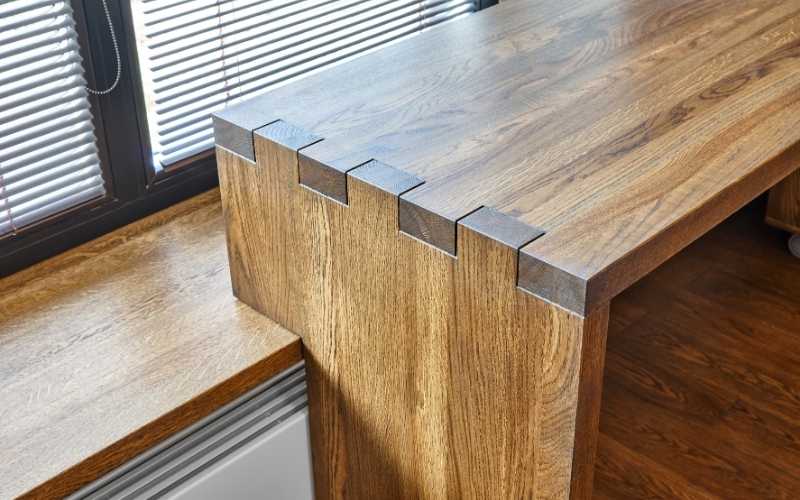
The box joint is a woodworking joint usually used for joining corners of boxes or box-like woodworks, which kind of tells why it’s called a box joint.
Making it involves cutting a set of complementary, square-shaped interlocking profiles through the end grain of both pieces of wood to be joined at right angles.
Glue is applied to the areas to be in contact and both pieces are fixed together to form the joint. The resulting joint is quite strong due to the high glue surface area of the joint.
9. Dovetail Joint
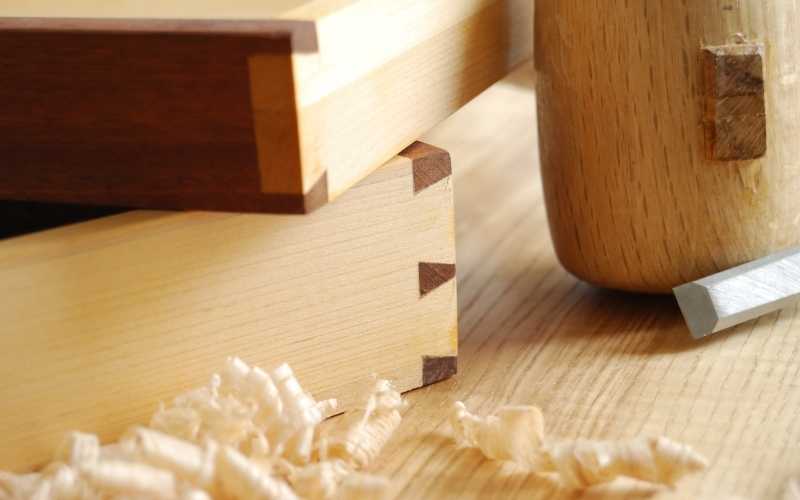
Here comes the highly popular dovetail joint. If I didn’t know anything about the Dovetail joint before now, I’d think the joint is shaped like a dove tail.
Well, let’s see. Here’s the picture of the joint below. Isn’t it shaped like the tail of a dove? I think it is.
Enough with the tail now. Here’s why the dovetail joint is a very important woodworking joint. It has a very high tensile strength. Once locked in place, it has a high resistance to being pulled apart.
If glue is added before locking the joint, then forget it. It’s virtually impossible to pull it apart.
The dovetail joint is employed in many woodworking joinery applications such as furniture and cabinet making, traditional timber framing and even in log home building.
It is used for making jewelry boxes, cabinets, drawers and other furniture pieces where the strength of the joint is very important.
There’re different types of dovetail joints you can employ for your woodworking joinery applications. These include the through dovetail, the half-blind dovetail, the secret double-lapped dovetail, the secret mitred dovetail and the sliding dovetail.
When making the dovetail joint, the dovetail angle also known as the angle of slope is determined by the type of wood used. If it’s a hardwood, then the angle of slope is 1:8, while if it’s a softwood, the angle of slope is 1:6.
10. Tongue and Groove Joint
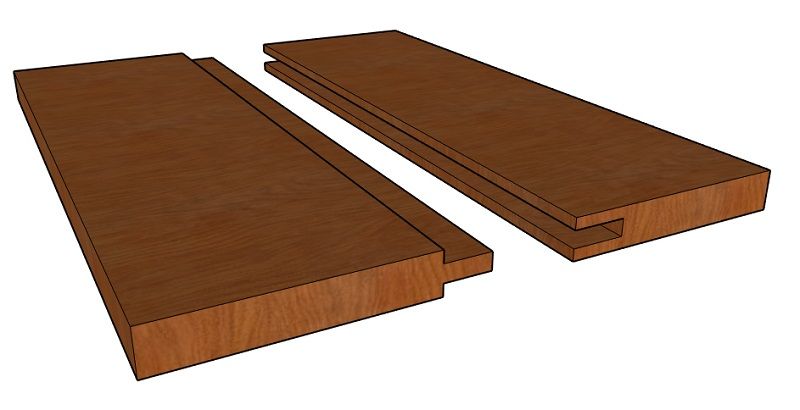
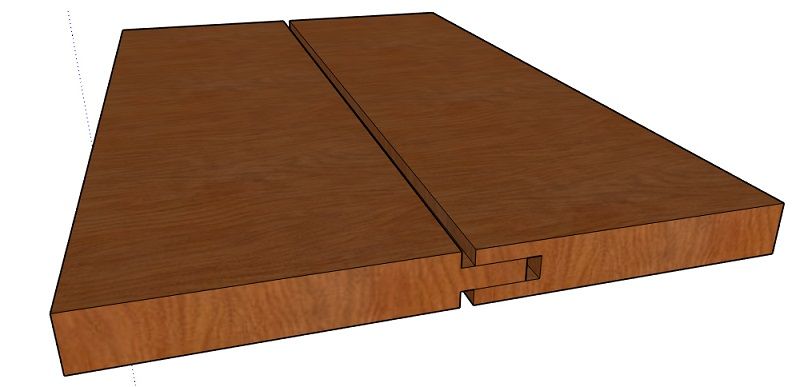
The tongue and groove joint is a unique woodworking joint that allows you to join two separate and mostly identical wood members together edge to edge.
This joint is used mainly for joining flooring boards, paneling, parquetry and other similar applications.
In a tongue and groove joint, one wood piece has a slut (groove) cut along one edge while the other wood piece has a deep ridge or tongue cut on the opposite edge that fits right into the groove.
The tongue is cut so it projects less than the depth of the groove and glue is not used when making the joint so it can shrink and expand freely without damaging the members.
11. Cross Lap Joint
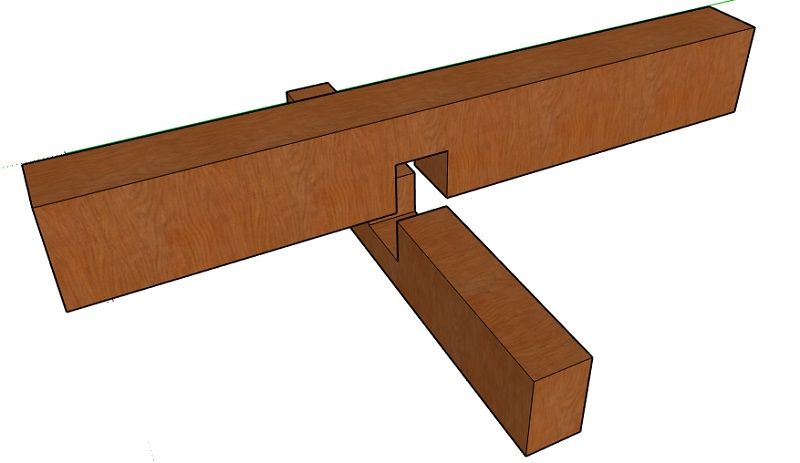
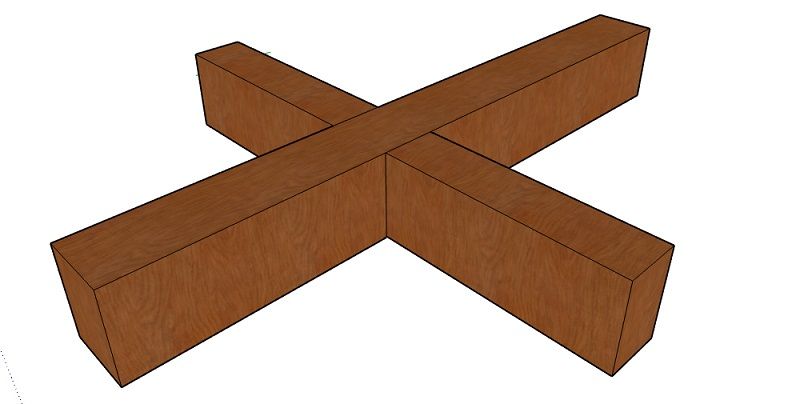
A cross lap joint is one of the easiest joint to make. It’s just like a lap joint already described above, but the wood pieces or members of the cross lap joint intersect at the center or close to it to form the cross lap joint.
Material is taken from each of the members at the point of intersection so that the combined cross lap joint is the thickness of the thickness member of the joint.
12. Splice Joint

Sometimes in woodworking, you have to join wood pieces end grain to end grain. For instance, when you need long beams of wood and among the lengths of timber, there’s none as long as the beam you require. What do you do? You join two or more lengths of timber together end to end to form a longer beam.
One of the best woodworking joints to use in this instance is the splice joint. It allows you to join lengths of wood together end to end. The resulting joint is structurally strong, and thus very useful when structural strength is required such as the house beam example above.
There are different types of splice woodworking joint which include the half lap splice joint, the tabled splice joint, the bevel lap splice joint, and the tapered finger splice joint.
13. Finger Joint
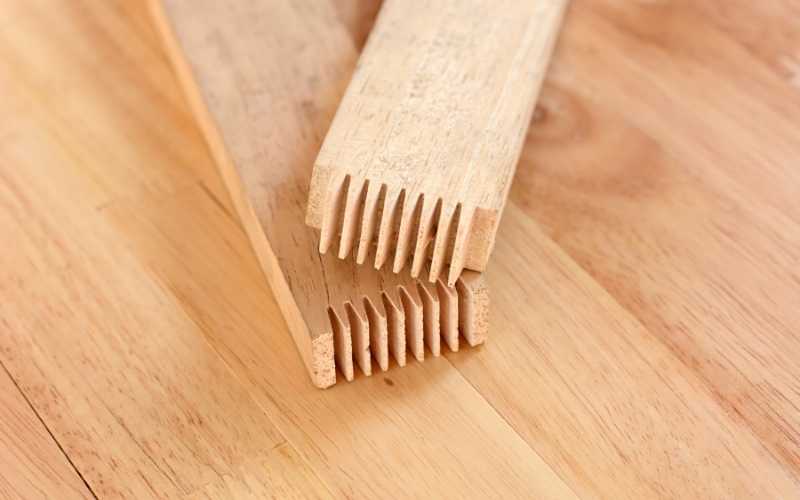
When you need to create long piece of solid boards like baseboards, mouldings and trim from shorter ones, the finger joint is woodworking joint you can employ.
It is made by cutting a set of complementary, interlocking profiles into the wood pieces which are then glued firmly together to form the joint.
It’s called a finger joint because, once the joint is form, the cross-section resembles the interlocking of fingers between two hands. It’s also known as a comb joint due to its looks as well.
The finger joint is sometimes confused with a box joint, but it’s not a box joint. Although I’d admit, it looks like it.
14. Birdsmouth Joint
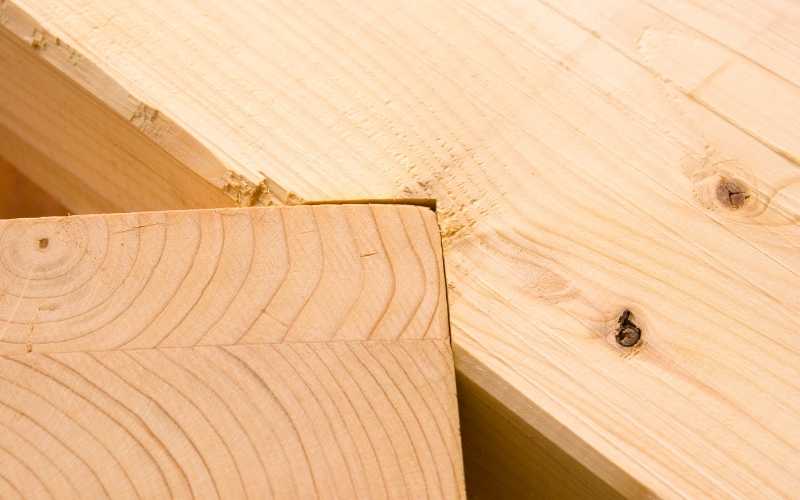
If you roof homes for a living, then you should be familiar with the birdsmouth joint. It’s a joint that is used to connect the rafter of a roof to the top plate of a supporting wall.
The birdsmouth joint is basically an indentation (the shape of a bird’s mouth) cut into the rafter which consists of a seat cut which rests on top of the top plate of the supporting wall and a heel cut with a face lying parallel to the wall supporting the rafter.
When cutting the rafter indentation of a birdsmouth joint, you need to make sure not to cut the seat too wide so that part of it does not lie unsupported which may lead to fracture along the grain of the wood and failure of the joint.
15. Biscuit Joint
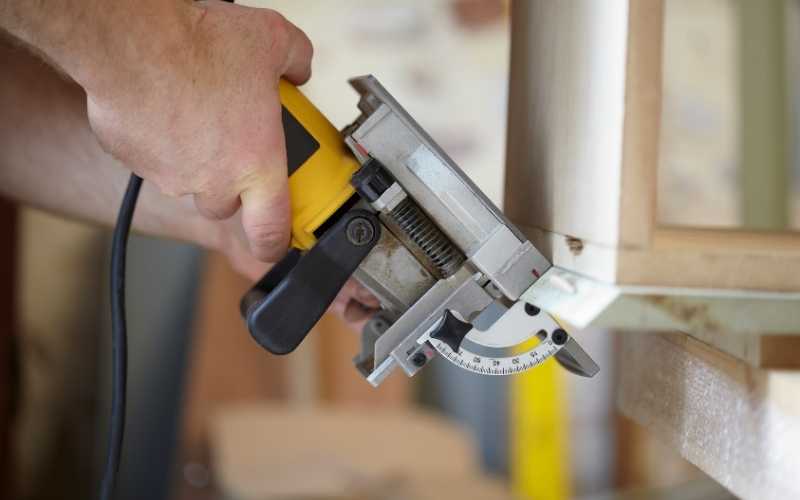
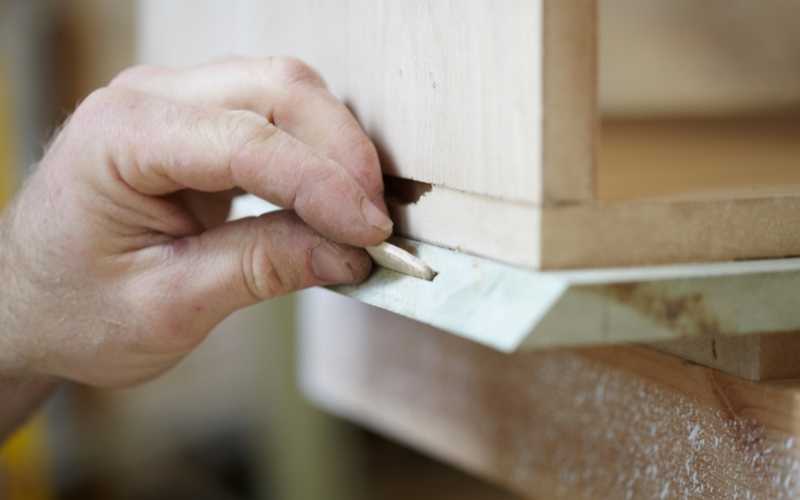
A biscuit joint is made by using a tool called a biscuit joiner to cut oval-shaped slots in the edges of the wood members to be joined. After which glue is applied to wooden or plastic oval-shaped discs known as biscuits, which are then inserted into the slots and the two wood members are clamped together for the glue to set. The biscuit inside the slot further expands while the glue sets due to the wetness of the glue to further solidify the bond.
Biscuit joints have many woodworking applications today. They’re mostly used for joining sheet goods such as plywood, medium density fibre board and particle boards.
Apart from joining sheet goods and particle boards, you can also join solid wood pieces edge to edge with a biscuit joint. The joint produce is very strong and can even be used instead of a mortise and tenon joint.
The major use of the biscuit joint or biscuits used is to align pieces of wood edge to edge to make wider panels of that wood. When joining these boards edge to edge, it’s important that you cut the slots through the same face of the boards, so that the boards are perfectly square when you join them.
To learn more about biscuit joints, you can read this article about biscuit joiners.
16. Pocket Hole Joint
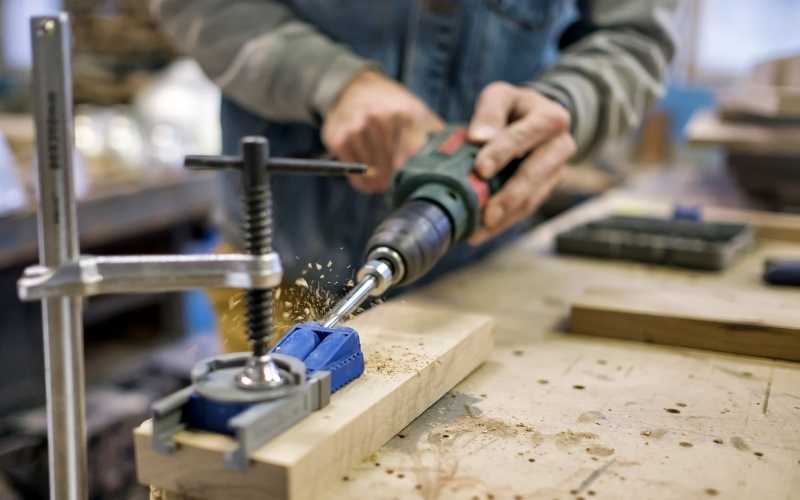
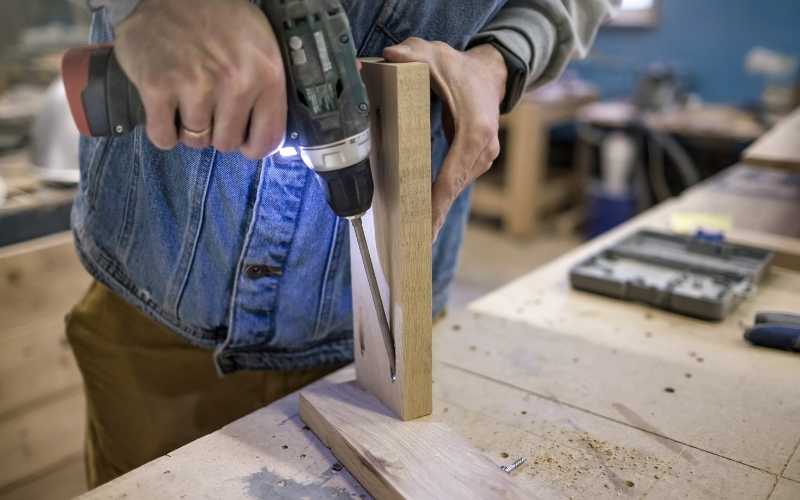
A pocket hole joint or pocket hole joinery is one of the most common means of joinery many woodworkers have turn to these days due to the many benefits that come with it.
It involves drilling pocket holes at an angle (usually 15 degrees) into one of the wood pieces to be joined, and then using a self-tapping screw to join it to the second wood piece.

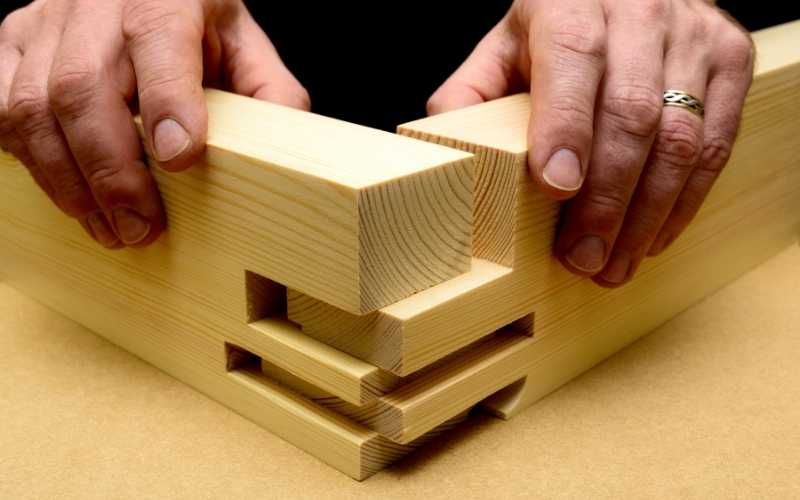
Thanks a lot for this power driven tool. It’s good you spoke about the bits. There is a problem. It’s rather unfortunate this tools are in our local shops without the bits. Please help me to get at least a few. It’s about 3 months since I bought it and ever since it has been a white elephant.
My brand is BOSCH POF 1200 AE.
I’m not sure who gave a degree, but number 6 is incorrect. The top picture shows a variation on biscuit joinery. The bottom picture shows a dowel reinforced lap joint. And the text refers to a nonexistent ‘reinforced butt joint’. But hey, 15 out of 16 is still pretty good.
If you can’t see the dowels in the top picture, then I don’t know what you’re looking at. As for the second picture, you’re right, it’s a dowel reinforced lap joint. But its purpose in the article is to show that you can use dowels just as you can use biscuits to reinforce many other woodworking joints. Yes, the text says the dowel joint is a butt joint reinforced with dowels, which is not wrong. Those pictures are there because you can use dowels to reinforce just about any joint. So at least, try to get the point.
Thanks
THANKS
You’re welcome. Thanks for reading!
Fantastic
Good morning
My name is Franco. I am currently doing my Stage 2 Research Project. I understand that you would be extremely busy, however, if you could take 10-15 minutes to research. Below are a few questions that you may give short responsive answers to, it would be sincerely appreciated. This would be extremely useful for my study of the strongest wood joints. Thank you very much in anticipation.
Kind regards
Franco
1. What is your favorite 90-degree wood joint and why?
2. What is a better 90-degree wood joint, ones with fasteners and ones without fasteners (for example scores and nails) please give a reason why?
3. What is the fastest wood joint to make?
4. What is the cheapest wood joint?