A simple torque wrench is usually the difference between an overtightened or under tightened lug nut and one that’s properly tightened.
If you work on cars or any other machinery where you have to tighten nuts and bolts such as those found in car suspensions, the engine, wheels and even brakes, knowing how to use a torque wrench is super essential.
When we mention the word torque, it means the the force that rotates an object about an axis or about a circular part. So when you rotate a nut or bolt to tighten or loosen it, you’re applying torque or rotating force to the nut or bolt.
When you rotate them to an extent, it starts getting harder to rotate and at a certain point, it stops rotating. That means it has reached its maximum torque. Rotating it further than that extents damages the thread, or worse can even break the bolt.
That is why nuts and bolts can be over tightened or under-tightened. Overtightening wears down the thread and gets it damaged. Under-tightening is also risky, just as in car tires, the nuts can come loose if they’re not tightened properly. That’s is why having a torque wrench is very important.
It allows you to tighten nuts and bolts to their specific torque ratings. Each nut and bolt have its specific rating you should not exceed.
Tightening the nut or bolt over that rating can damage them. Using a torque wrench, you can be able to avoid that situation, and tighten them to their specific ratings or specifications from the manufacturer.
This will prevent you from wearing them out when you over-tightening them, or prevent you from putting yourself in danger when you under-tightening them.
Now that you know what a torque wrench is, it’s important that you know the different types you can make use of.
Table of Contents
Types of Torque Wrench
There’re different types available today. They include:
- Click
- Electronic
- Mechatronic
- Slipper
- Pneumatic
- Beam,
- Dual-signal deflecting beam
- No-hub torque wrench
- Hydraulic
Among the different types listed above, the click type is the most common one. It’s the one you’ll most often come across.
So, I’m going to show you how to use it during your next project.
Related: 23 Types Of Wrenches And Their Uses
How To Use A Torque Wrench
Say you have a flat tire and you want to change to your spare tire, you have to loosen all the nuts holding the wheel to the car suspension, and you’ll have to tighten them again once you’ve replaced the wheel.
The following steps will show you how to use a torque wrench to tighten the lug nuts when you put in the spare wheel, so you don’t over-tighten or under-tighten them.
In this example, I’m going to be using the click wrench to explain the process because it’s the most common one you’ll likely find.
Step 1: Know The Torque Ratings Or Specifications Of The Lug Nuts
First step is to know the torque specifications of the nuts and bolts you’re trying to tighten down. To know that, check the service manual of the vehicle you have.
Inside the service manual, you’re going to find the basic procedure to repair the vehicle part you’re trying to repair, and you’re also going to find the torque specs or ratings of each nut and bolt you’re going to tighten.
Now, say you’re trying to replace the wheel of your car, then you should check your service manual and see the specs of the lug nuts holding the wheel.
The lug nuts in most wheels are tightened down to a 100 lb-ft. Once you know the specs, it’s time to grab your wrench.
Related: 5 Best Impact Wrenches For The Most Stuck Nuts And Bolts
Step 2: Get The Correct Torque Wrench Size
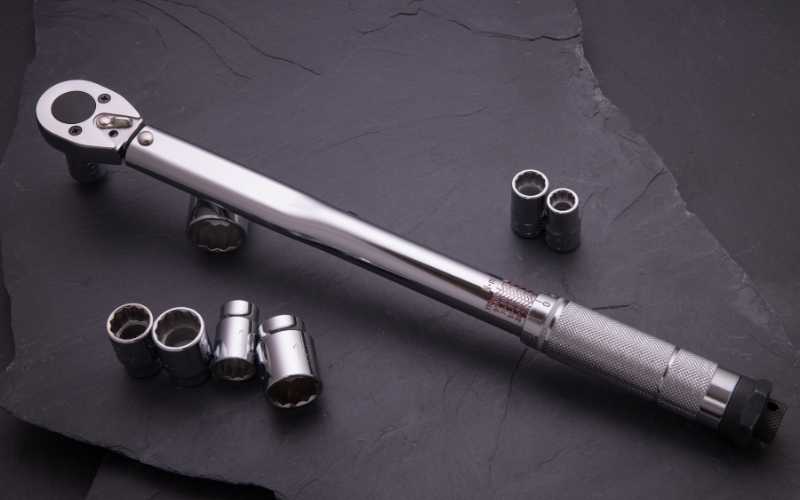
Get the correct size of wrench. There’re 3 main sizes of torque wrenches you’re going to find, which include the ¼ inch drive, the 3/8 inch drive and the ½ inch drive.
If you’re working on cars, most of the time, you’re going to be using the ½ inch drive. Since you’re trying to change the wheels, you need to grab the ½ inch drive.
Related: Essential Car Maintenance Tools and Gear Every Car Owner Needs
Step 3: Adjust The Wrench
The next step is to adjust the wrench to the torque specs or rating of the lug nuts, which is 100 lb-ft. To do that, loosen the little adjustment knob at the back of the wrench so the handle can be free to rotate and move back and forth.
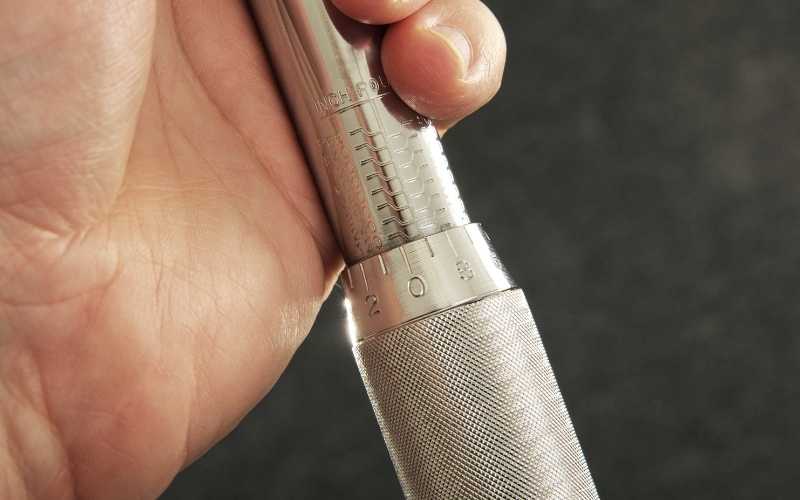
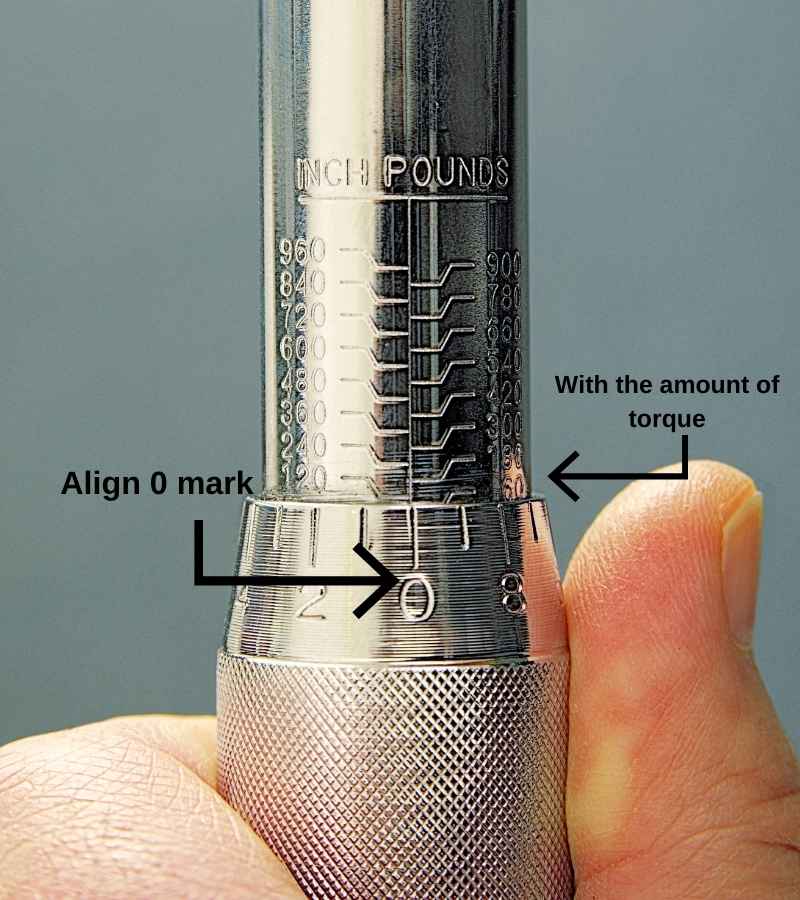
Once the handle rotates freely, rotate the handle until the 0 inscribed on the handle lines up with the 100 lb-ft line on the bar.
If you want 101 lb-ft of torque, rotate the handle forward until the 1 mark on the rotating handle just exceeds the 100 lb-ft line. If it’s 102 lb-ft, rotate it forward again, clockwise until the 2 mark on the rotating handle just exceeds the 100 lb-ft line on the bar.
If you want 99, rotate the handle anti-clockwise downwards one click down from the 100 lb-ft line on the bar, so the 9 mark on the handle lines up just before the 100 lb-ft line.
That’s how to adjust a click torque wrench.
Now, since we’re tightening the lug nut to a 100 lb-ft, we have to line up the 0 mark on the handle with the 100 lb-ft mark on the bar.
Once it’s all lined up, tighten the adjustment knob at the back of the wrench so the handle doesn’t rotate and the settings does not change when you’re trying to tighten down the lug nut.
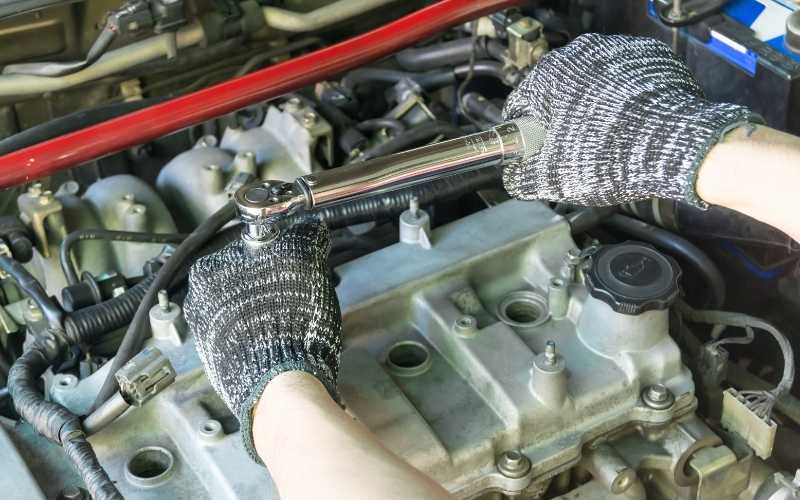
Step 4: Tighten The Lug Nuts

After you’ve adjusted the wrench to your desired torque, it’s time to tighten the lug nuts.
To do this, get your socket and insert it in the wrench, put it in the lug nut and start tightening clockwise until you hear a click.
The click sound means you’ve reached your desired torque. So you have to stop tightening that lug nut and move on to the next.
Tighten the rest of the nuts just the same way.
Once you’re through, you can stow away your wrench, with the peace of mind that your lug nuts have been tightened to the correct ratings. So, you don’t have to worry whether you’ve over-tightened or under-tightened them.
Hello. So, I “rented/borrowed” a torque wrench from O’Reilly’s. Need to do head bolt to 44 ft lbs, plus 90 degrees. Did first 8 on one head to 44, moved dial to 55 so I could add the 90 degrees. Then went to second head. Dialed back down to 44. Busted bolt. Looking at instructions, which I didn’t bother to do initially, it says that when resetting wrench, always go back to zero. Is this common knowledge? Because the guy at the store didn’t say anything, and I’ve looked at a couple of videos online that also didn’t mention this. Is that why my bolt busted, because it was still set at 55, or was that wrench just faulty?