The process of resawing lumber with a bandsaw is nothing new, but not everyone knows how it’s done. Mastering it requires not only practice but time to hone every technique it requires.
Because of that, we’ve gathered all the tips, tricks and technique you can learn right here in this article, to help you start resawing lumber perfectly with your bandsaw.
Before discussing these tips however, it’s important for you to know what it means to resaw lumber if it’s a new concept to you, and why it’s a big deal.
Table of Contents
Why resaw lumber in the first place?
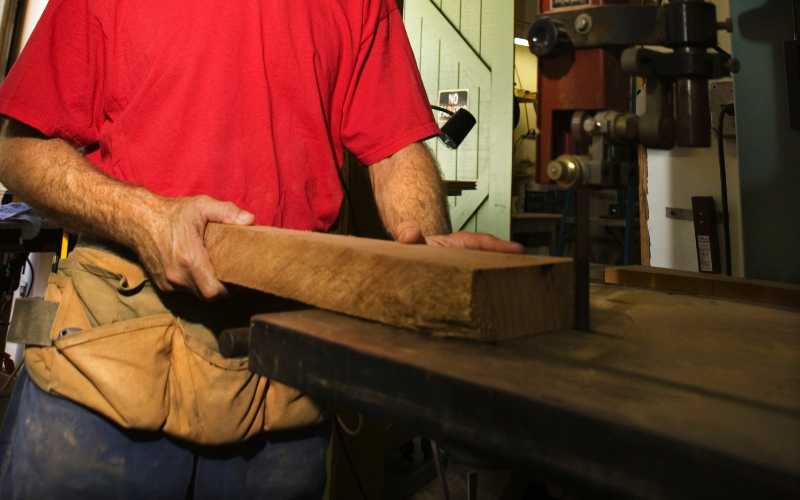
Resawing is one of the most important reasons for owning a bandsaw especially if you work with large or thick stocks of wood.
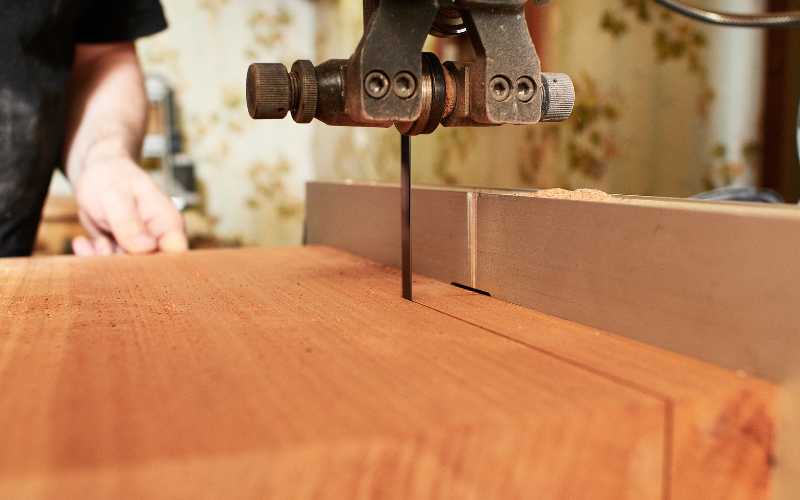
It’s the process of cutting a thick wood stock along the grain of the wood into two or more thinner pieces.
For instance, if you have a 2 inch thick stock of wood, and you need a 1 inch thick board. Instead of running the 2 inch wood in a thickness planer to reduce the thickness to 1 inch, you can just resaw it into 2 parts using a bandsaw,
You’ll get your 1 inch thick wood and another identical piece of wood slightly less than 1 inch due to the thickness wasted by the kerf of the blade.
You can use the identical piece later for another project.
Apart from multiplying your stock, it’s also useful for producing book-match pieces that can be used for cabinet making or other furniture projects.
If you need veneers for your cabinet making projects, you can use your bandsaw to resaw them off any suitable thick stock of wood at your disposal.
Now that you know what resawing is all about, here are the tips and techniques to help you work with your bandsaw to produce the best resawn lumber ever.
1. Start by choosing the right resawing blade
As with any other saw, there’s no one size fits all when it comes to bandsaw blades. You’re going to have to choose the right resawing blade depending on the type of material you’re sawing or the activity you’re carrying out with your bandsaw.
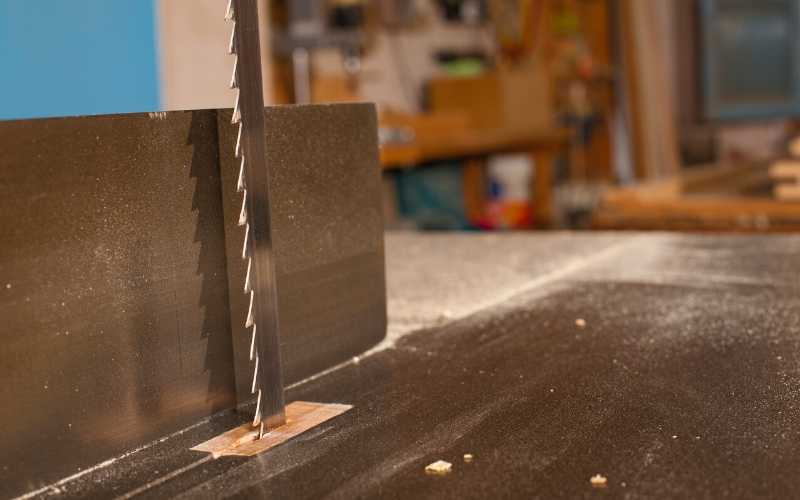
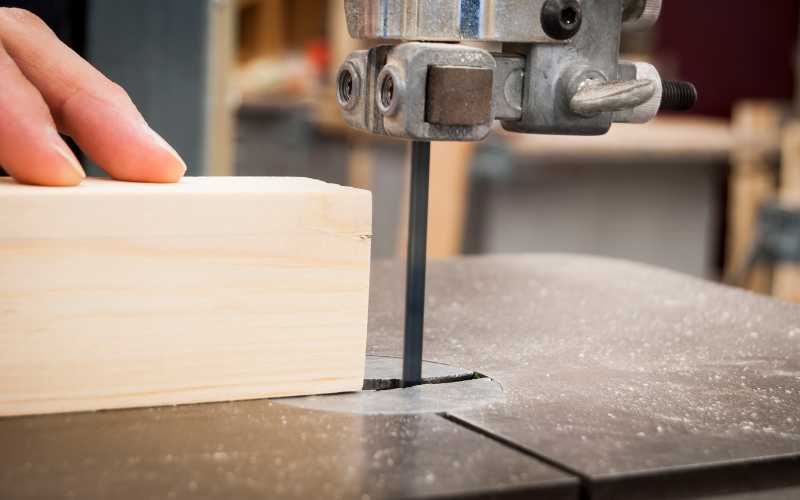
Resawing involves cutting through very thick lumber. As the blade passes through the wood, the blade tooth shaves off enormous amount of saw dust which goes into the gullet or the space between two teeths of the blade.
Once that gullet fills up, the sharp end of the teeth will no longer make contact with the wood, which in turn will prevent the blade from cutting further until the area inside the wood has cleared the stock.
Hence, the type of blade you need to use for resawing should have enough gullet depth or room between the teeths of the blade to house the sawdust generated until the tooth emerges from the stock you’re cutting.
Any blade with about 3 teeths per inch have gullets that are large enough to accommodate much sawdust before exiting the stock.
So, when choosing a blade for resawing thick lumber, make sure that it has a minimum of 3 teeths per inch to be able to cut the stock efficiently.
The width of the blade is also very important. In principle, the wider the bandsaw blade, the better it is for resawing due to its higher beam strength and better capacity to maintain a straight line through the cut.
However, you want to make sure that the blade you choose is suitable for use on your bandsaw. You don’t have to go buy the widest bandsaw blade you can find when your bandsaw cannot accommodate it.
2. Cut very thin pieces outside the blade
When resawing a thick block of wood using a fence, like cutting veneers from a thicker stock, the veneer piece which is very thin should not be wedged between the fence and the blade.
Instead, the thicker stock should be inside the blade wedged between the blade and the fence. That will allow the blade to cut through easily without the thicker heavier stock pushing the blade farther into the veneer piece.
So, always cut a very thin piece like a veneer outside the blade and not wedged in-between the fence and the blade.
3. Don’t forget to tension the blade
If you don’t add enough tension to your blade, it will flutter or move from side to side when you start resawing with it, which is not going to give you very good results.
Once you’re chosen a proper blade following the first tip above, it’s time to install it on your bandsaw and add adequate tension to it.
When installing it, make sure the lateral guides and thrust bearings are opened u and backed off both above and below the bandsaw table so that they do not make contact with the blade.
For safety, make sure the saw is unplugged, and then crank on some tension on the blade. With your index finger, carefully give the blade a sharp sideways poke about halfway between the upper and lower wheels of the saw.
When you do this, the blade will deflect a short distance and return. Crank it again and poke it sideways again and watch how far it deflects.
Repeat until it quits deflecting easily when you poke it sideways. You want to continue adding tension until the sideways deflection is just 1/4 inch to 5/16 inch on bandsaws with 6 inches depth of cut, or 3/8 inch to 1/2 inch on saws with 12 inches depth of cut.
Don’t look at the bandsaws guage while doing this to avoid confusing yourself with the readings of the saw.
Once you’ve tensioned it without the saws gauge, use this same reading as a guide when tensioning the blade again in the future.
Finally, track the blade on the upper wheel of the saw so that the deepest part of the blade’s gullet is just at the centerline of the tire.
Proper tensioning like this will help you get the best results when you start resawing with the blade.
4. Adjust the blade guides
The next step is to adjust the blade guides. To do this, close the wheel covers without bringing the lateral guides and thrust bearings up close to the blade.
Next, plug in the saw, turn it on and make sure the blade is tracking well at full speed. If it’s not, then adjust the tracking settings as necessary until it’s tracking well.
If the blade is blurry as it’s running, then it’s vibrating. To stop this vibration, increase or decrease the tension slightly. Do this until the blade runs quietly in a straight line from wheel to wheel of your bandsaw.
Once you’ve achieve this, bring your lateral blade guides and rear thrust bearings close to the blade. You’re set for the next step.
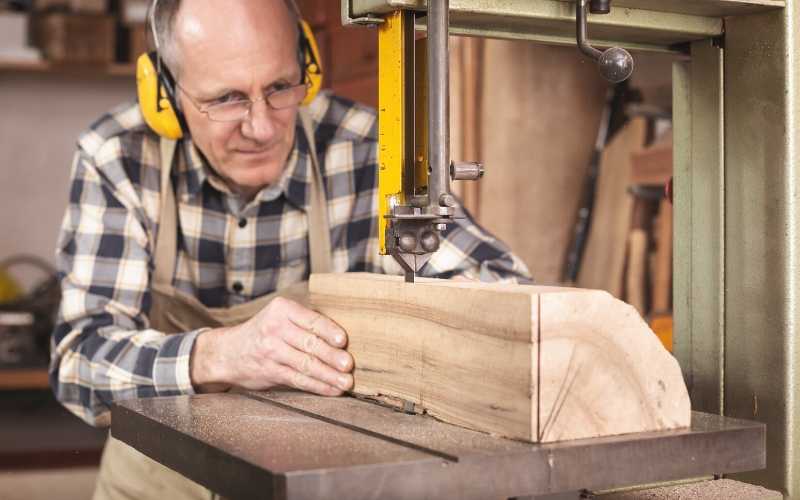
5. Use a point block if you’re resawing just one or two pieces
If you’re not resawing many pieces of wood from your stock, or if you don’t have many stocks on ground to resaw, then you can forget adjusting your main fence and just use a point block fence.
This is a curved fence tall enough to hold the stock, which you can use to freehand the cut. Just mark the cut line full length on the stock you want to cut, and make sure to leave a generous margin for error since it’s a freehand cut.
Now set the point block to your target width, place your stock and make a freehand cut, adjusting the feed direction as you make the cut.
This is a less precise way but fast way you can use to make single or very few resaws on your bandsaw. Although the time you saved on the bandsaw will be spent on the thickness planer and more of the wood will be wasted compared to when you spend some time adjusting the bandsaw’s fence before making the resaw.
6. Adjust your saws fence to the lead angle of the blade
If you have large volumes of stocks to resaw, then using a point block as described above is a bad idea. This time, you need to adjust your fence to the lead angle of the blade, so that the resaw will be as straight as it possibly can.
Adjusting the fence first for this type of cut will allow you to make accurate, repeatable cuts, ultimately making your job faster.
Take note that you’re not setting your fence perpendicular to the front edge of your saw table or parallel to the miter slot.
This is to account for the blade drift, which is a tendency of the bandsaw blade not cutting parallel with the fence or miter slot.
To account for this drift, you need to adjust the fence to the lead angle of the blade. To do this, first set the fence so that it’s skewed to the right or left at least ½ inch out of parallel to the miter slot.
If you can’t adjust your fence, then try upgrading your fence to an aftermarket fence that can be adjusted like Kreg’s precision bandsaw fence.
If you don’t want to upgrade your fence, then you can leave your fence parallel with the miter slot and try adjusting the blade so that it’s parallel with the fence by adjusting the angle of the upper wheel of the bandsaw.
Now, with an adjustable fence, you can take a scrap wood, joint one edge of it and mark a straight line on it.
Resaw it freehand along the line you marked and adjust your feed direction until you’re cutting directly along the straight line you marked.
Hold the stock still on the table ones you’re cut about 5 inches along the straight line. Turn off the saw and use a pencil to mark a straight line on the table along the edge of the test piece.
You can now set your resawing fence parallel to this straight line and make your first cut. After the cut, you may find out that the blade bowed left or right within the stock.
The direction to which it bows will show you how to fine tune your fence for even more straight and precise cuts.
If the blade bows left, you need to adjust the far end of the fence slightly to the right, and if it bows to the right, you need to adjust the far end of the fence slightly to the left and make another test cut.
Depending on the quality you seek, you might make few more test cuts until you find the accuracy you desire. Once you’ve found it, every cut you make from there will come out straight and identical with the last piece.
7. Maintain a proper feed rate

Even when every other thing is fine tuned to perfection on your bandsaw, one other factor that can affect the quality of your resaws is the rate at which you feed the stock through the blade.
Feed in too fast and you’d get pronounced and wide diagonal tooth marks on the wood, and feed the stock too slow through the saw and you risk wearing out the blade faster than the proper rate.
With everything properly adjusted, you now need to learn how to feed in your stock moderately at a consistent pace, not too fast and not too slow so that your stock will come out with the surface you desire.
So, take it easy when feeding in the stock, so you get a nice and consistent finish with very little work to do, once the cut is complete.
8. Keep the blade clean
The more you cut with a blade, the more debris accumulate around the teeth, and the more materials or sawdust accumulate round the teeth, the harder it is to cut with the blade.
Not cleaning off this sawdust that accumulate around the blade teeth can cause it not to cut properly. The finish on the surface of the resawn lumber will not come out clean and the blade will dull faster.
So, make sure you clean your resawing bandsaw blades regularly to keep them sharp and easier to work with.
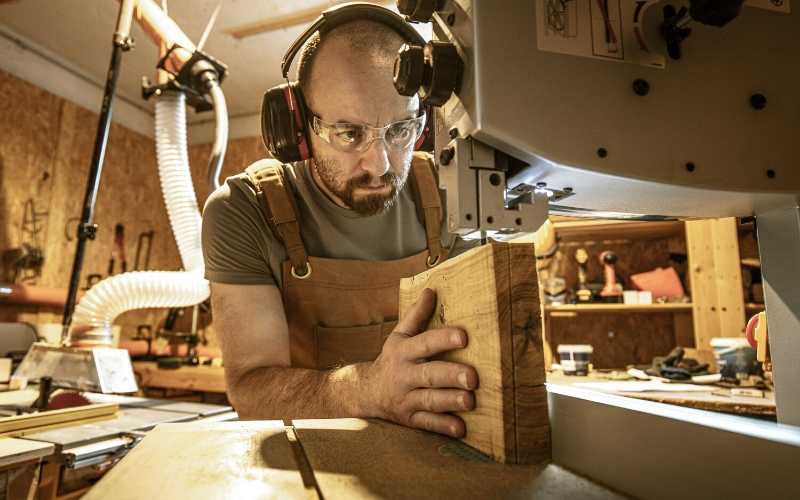
9. Use a push block
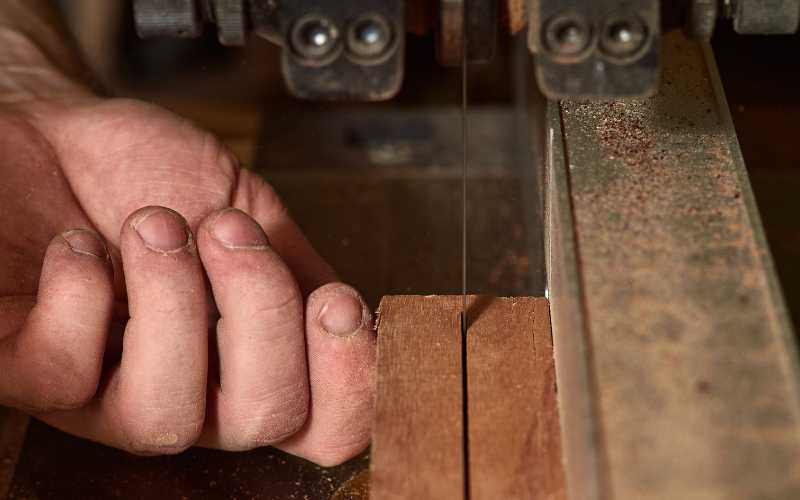
You only have one set of fingers. I’m sure you wouldn’t want to lose them to your bandsaw. So, whenever you’re resawing, always use a push block.
Not only when using a bandsaw but also when using other power tools like this such as table saws and jointers.
The hand feeding the stock into the bandsaw should be handling a push block. Never push with your hand directly close to the blade. Use a push block instead, so that in case of any mishap, it’s the push block that takes a cut, not your hands.
Any little mistake can be fatal. So, always use a push block to handle the stock and follow every other safety rules for operating the bandsaw in the manufacturer’s handbook.
10. Use a thickness planer or sander to smooth the surfaces of resawn pieces
If you really fine tune your bandsaw as shown above and you used a proper feed rate to feed the stock through the saw, all the pieces will come out very straight with a smooth surface.
Running them through a thickness planer however, will remove any bandsaw marks left on the surface and produce an even smoother surface. So, make sure to run all the resaw pieces through your planer to get the perfect surface you need for your projects.
If the stock is to small to go through a planer, you can always use a sander smoothen it further and get the finish you desire.
Finally, the tips and instructions shown here will only get your feet on the door. Regular practice will get you in and help you become better at resawing lumber with your bandsaw.
Thanks for the information. I just acquired a used JET JWBS-14CS bandsaw. I have almost no knowledge or experience using a bandsaw and have a small resaw project to do. Your article was immensely helpful in understanding what I need to know and do. In examining my bandsaw I noticed the previous owner had cobbled up the saw guides by using pieces of copper tubing on both the upper and lower blade guides. ???? They seem to work OK but I immediately ordered both some composite blocks and a set of bearing guides to replace the block guides, plus several blades of different widths and tooth patterns.
Thanks for the information. I just acquired a used JET JWBS-14CS bandsaw. I have almost no knowledge or experience using a bandsaw and have a small resaw project to do. Your article was immensely helpful in understanding what I need to know and do. In examining my bandsaw I noticed the previous owner had cobbled up the saw guides by using pieces of copper tubing on both the upper and lower blade guides. ???? They seem to work OK but I immediately ordered both some composite blocks and a set of bearing guides to replace the block guides, plus several blades of different widths and tooth patterns.
I don’t understand the problem with your website regarding posting a comment.
Sorry if you encounter any difficulties with our comment system. When you make a comment, your comments are moderated first before they’re approved and posted on the blog.
This is very necessary to prevent spam comments from finding their way into our blog. We receive hundreds of spam comments everyday, and the comment moderation feature helps us fish them out and keep genuine comments like yours visible to our readers.
Nice article…can’t wait to try these techniques…I’ve always had problems with blades not following the lines, but the owner’s manual said it’s because the blade teeth need to be sharpened on one side or the other by letting the blade run against a sharpening stone (which didn’t solve the problem).
Thanks for stopping by Glenn. Please let me know your results once you’re done applying them. By the way, also consider the size of bandsaw you have. Smaller units tends to be less effective for resawing.
very good step by step instructions on resawing !, everything went well until my polyurethane tire on upper wheel, bottom one is firm and no signs of it coming undone, unraveled and threw off my blade and snapped !
I am new at using bandsaws i own a Jet JWBS-15-3 , 15″ beauty , i don’t understand what happened ! ,
any ideas and , do i need to glue my tire ? , i’ve heard from an old wood-smith to replace it for same!, maybe i kept my saw in a no climate control environment for a long time , i live in a
very hot days mediterranean summers area no freezing temps in winter.
any input is most appreciated.